<< 以下為轉載文章。。。>>
2019/6/7
想要玩電腦遊戲,首先你要有一台可以運作的電腦;想要架設服務,你需要有一台設定好的的 Server。下文將簡單說明如何在 Azure 上架設 Windows Server 2019,與注意事項。


機器的選項都選好了之後就開始 deploy 它了,此時會看到 Your deployment is underway 的字樣。注意在這時,就算你把瀏覽器關掉去做其它事,它也會繼續部署。數分鐘後,就可以看到 Your deployment is complete 的字樣。
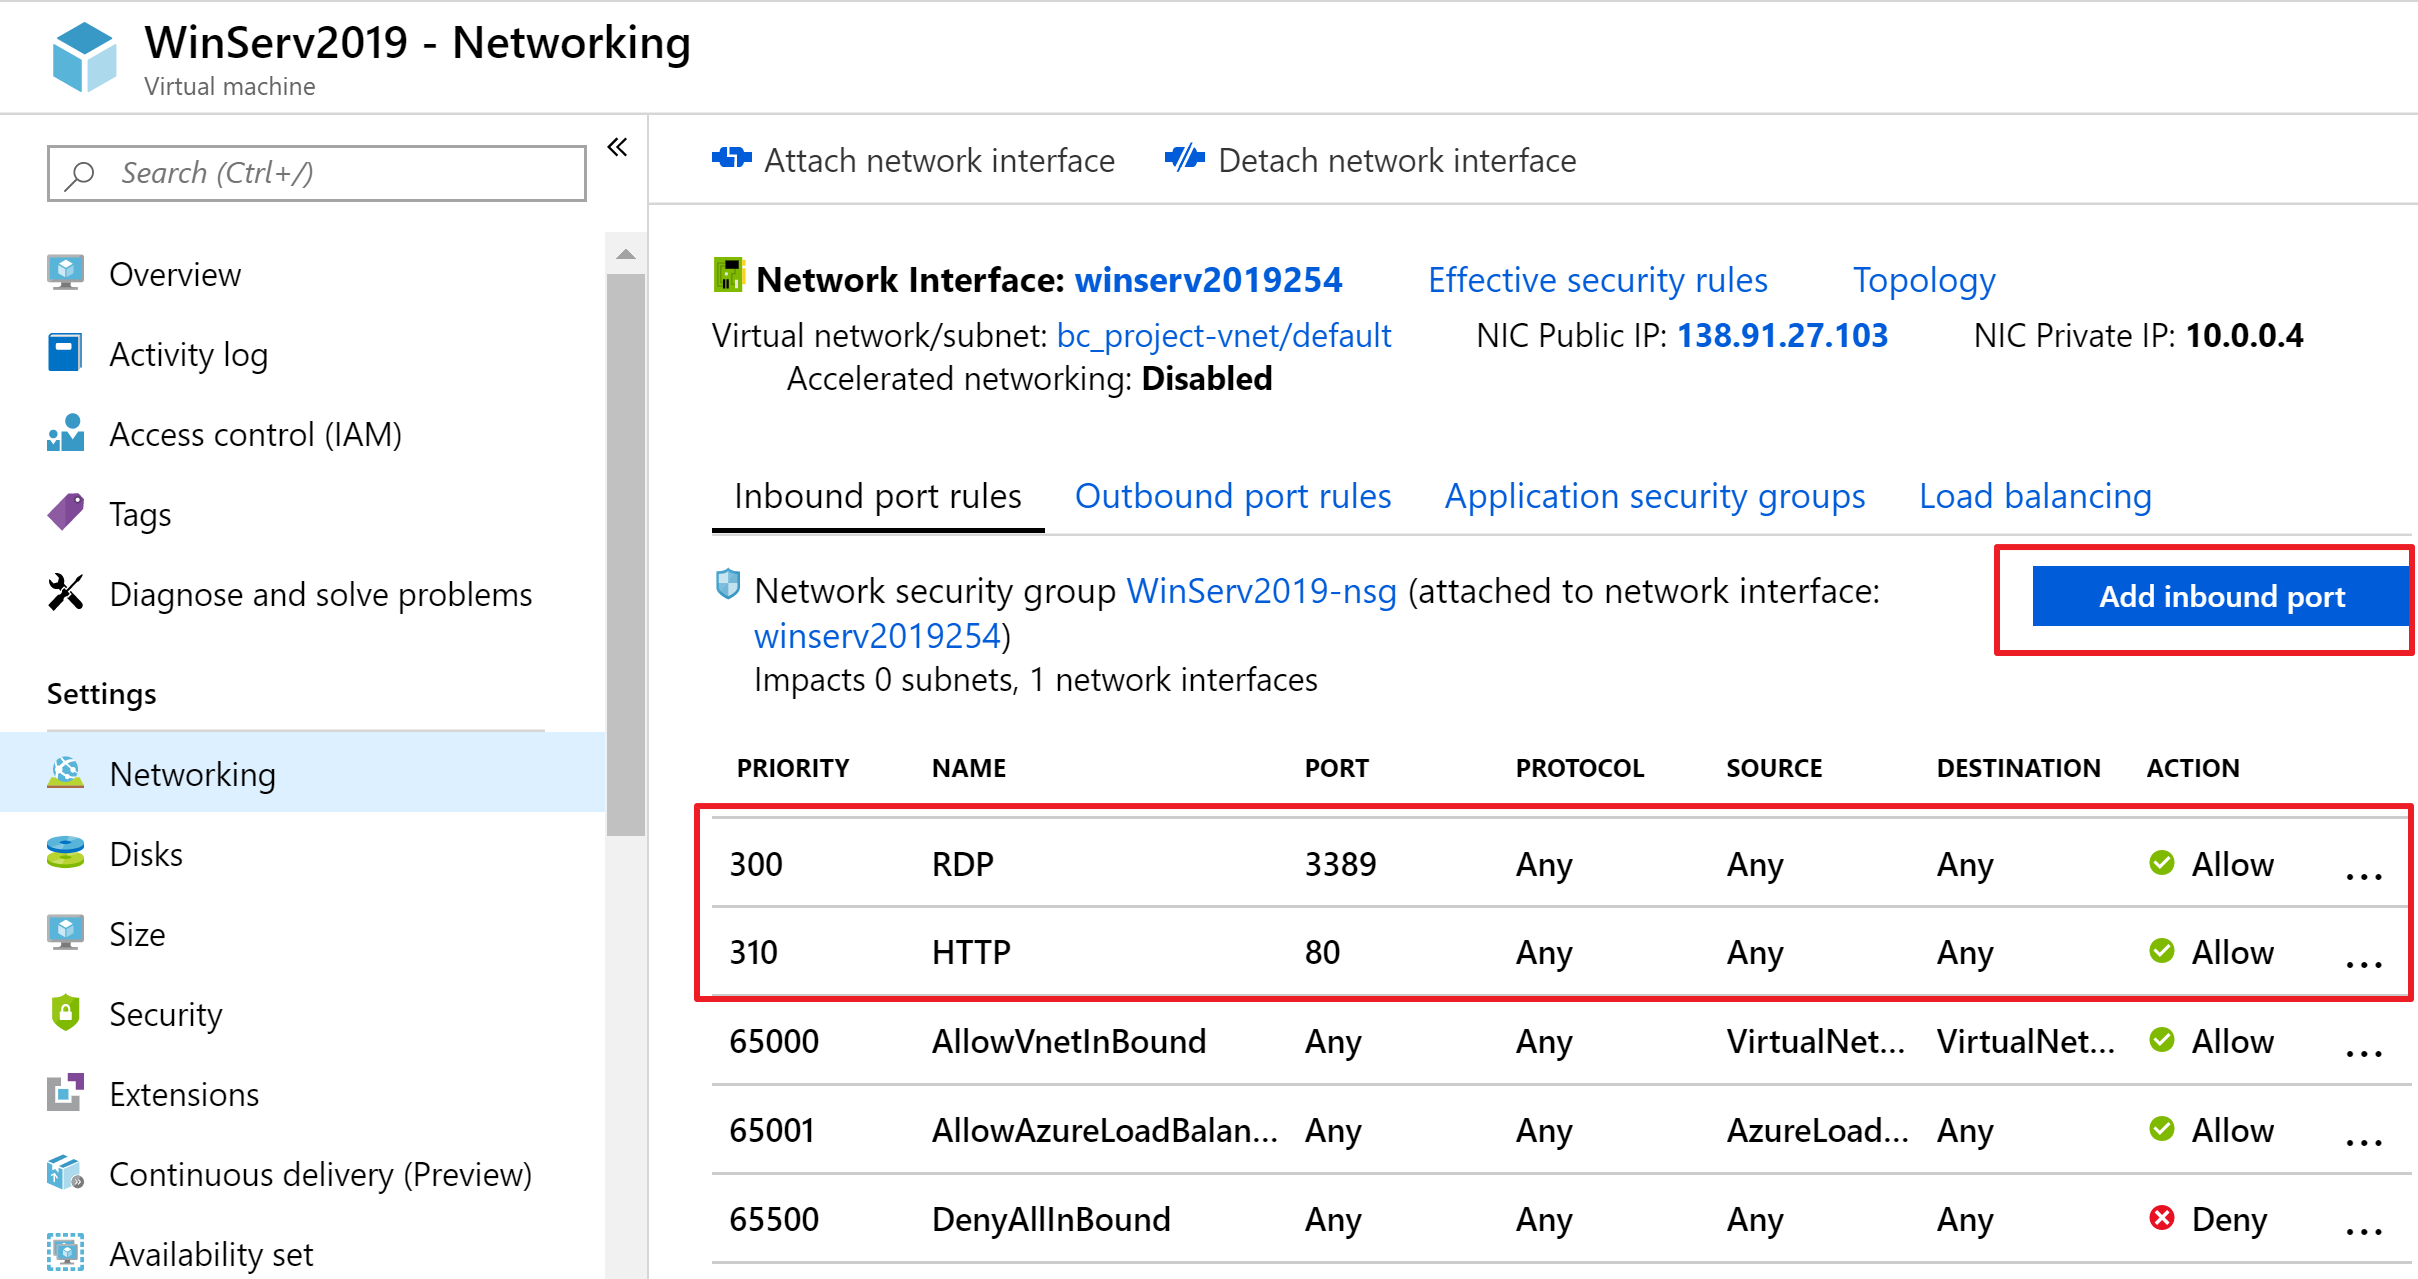
機器好了之後,先別急著要登入。我們找到剛剛部署好的 WinServ2019,然後在 Setting 的 Networking 處,利用 Add inbound port 的功能,加入 port 3389 (for RDP,即遠端登入) 和 port 80 (for HTTP),如下圖。這篇稍微講一下其 Priority 的機制:在你透過某種方法去連線時,系統會從 Priority 小的選項慢慢檢查上去。如果找到了符合的 Entry,就執行該 Action。例如我們透過 port 80 (HTTP) 去連線,會找到 Priority 301 的項目,並執行該 Action,即 Allow (connection)。

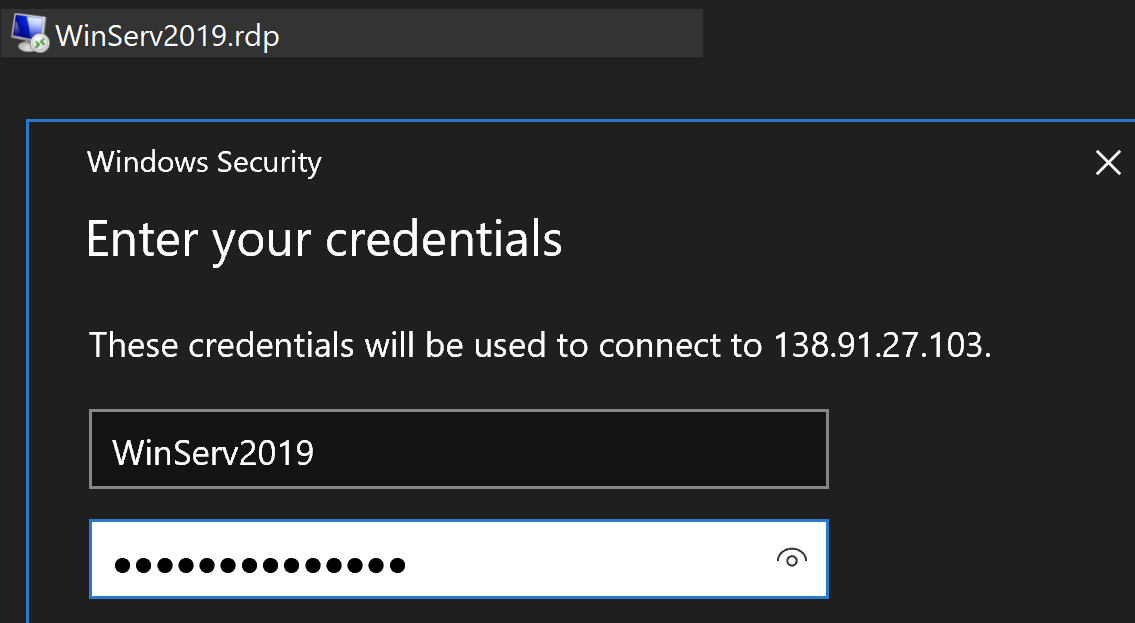
之後,我們終於可以下載 Remote Desktop,並且登我們的 Windows Server 2019。


現在我們已經利用 Remote Desktop 來登入我們的 Windows Server 2019 了。接下來,我們來簡單設定一下 IIS (Internet Information Server)。


靜待它設定完畢後,我們退出 Remote Desktop,並在自己的瀏覽器上面打上 Windows Server 2019 的 public ip,例如 138.91.27.103,如果有看到如下方圖片即為成功。注意,因為我們在前面已經在 Networking 的地方加入 Port 80 (for HTTP) 的規則了,所以這邊不用再做一次。沒有設定是會連線失敗的。


最後,筆者要提醒一下 Azure 計費的小規則,也可以說是大部份人不知道的盲點。如果你認為帳號用完後登出 Server,或是在 Remote Desktop 內直接把 Server 關機,Azure 就不會跟你收登出或關機時候的費用,這個想法完全是錯的。想要達成完整的關機 (關閉服務),必須直接 Stop 掉整個服務才行,如下圖:


在以往,停止服務會造成再重啟後整個 public ip 直接改變。如果你有使用此台機器 ip 設定的第三方元件,或是與之整合的系統,public ip 改變都可能造成問題。幸好,現在 Azure 在你停止服務的時候,會提醒你這件事情,並且問你要不要保留 public ip。如果保留,下一次你 Start 虛擬機服務時會發現 public ip 還是一樣的。


留言
張貼留言
留下您的意見